Rambush
Portfolio
Digital clock using Pygame
June 2026
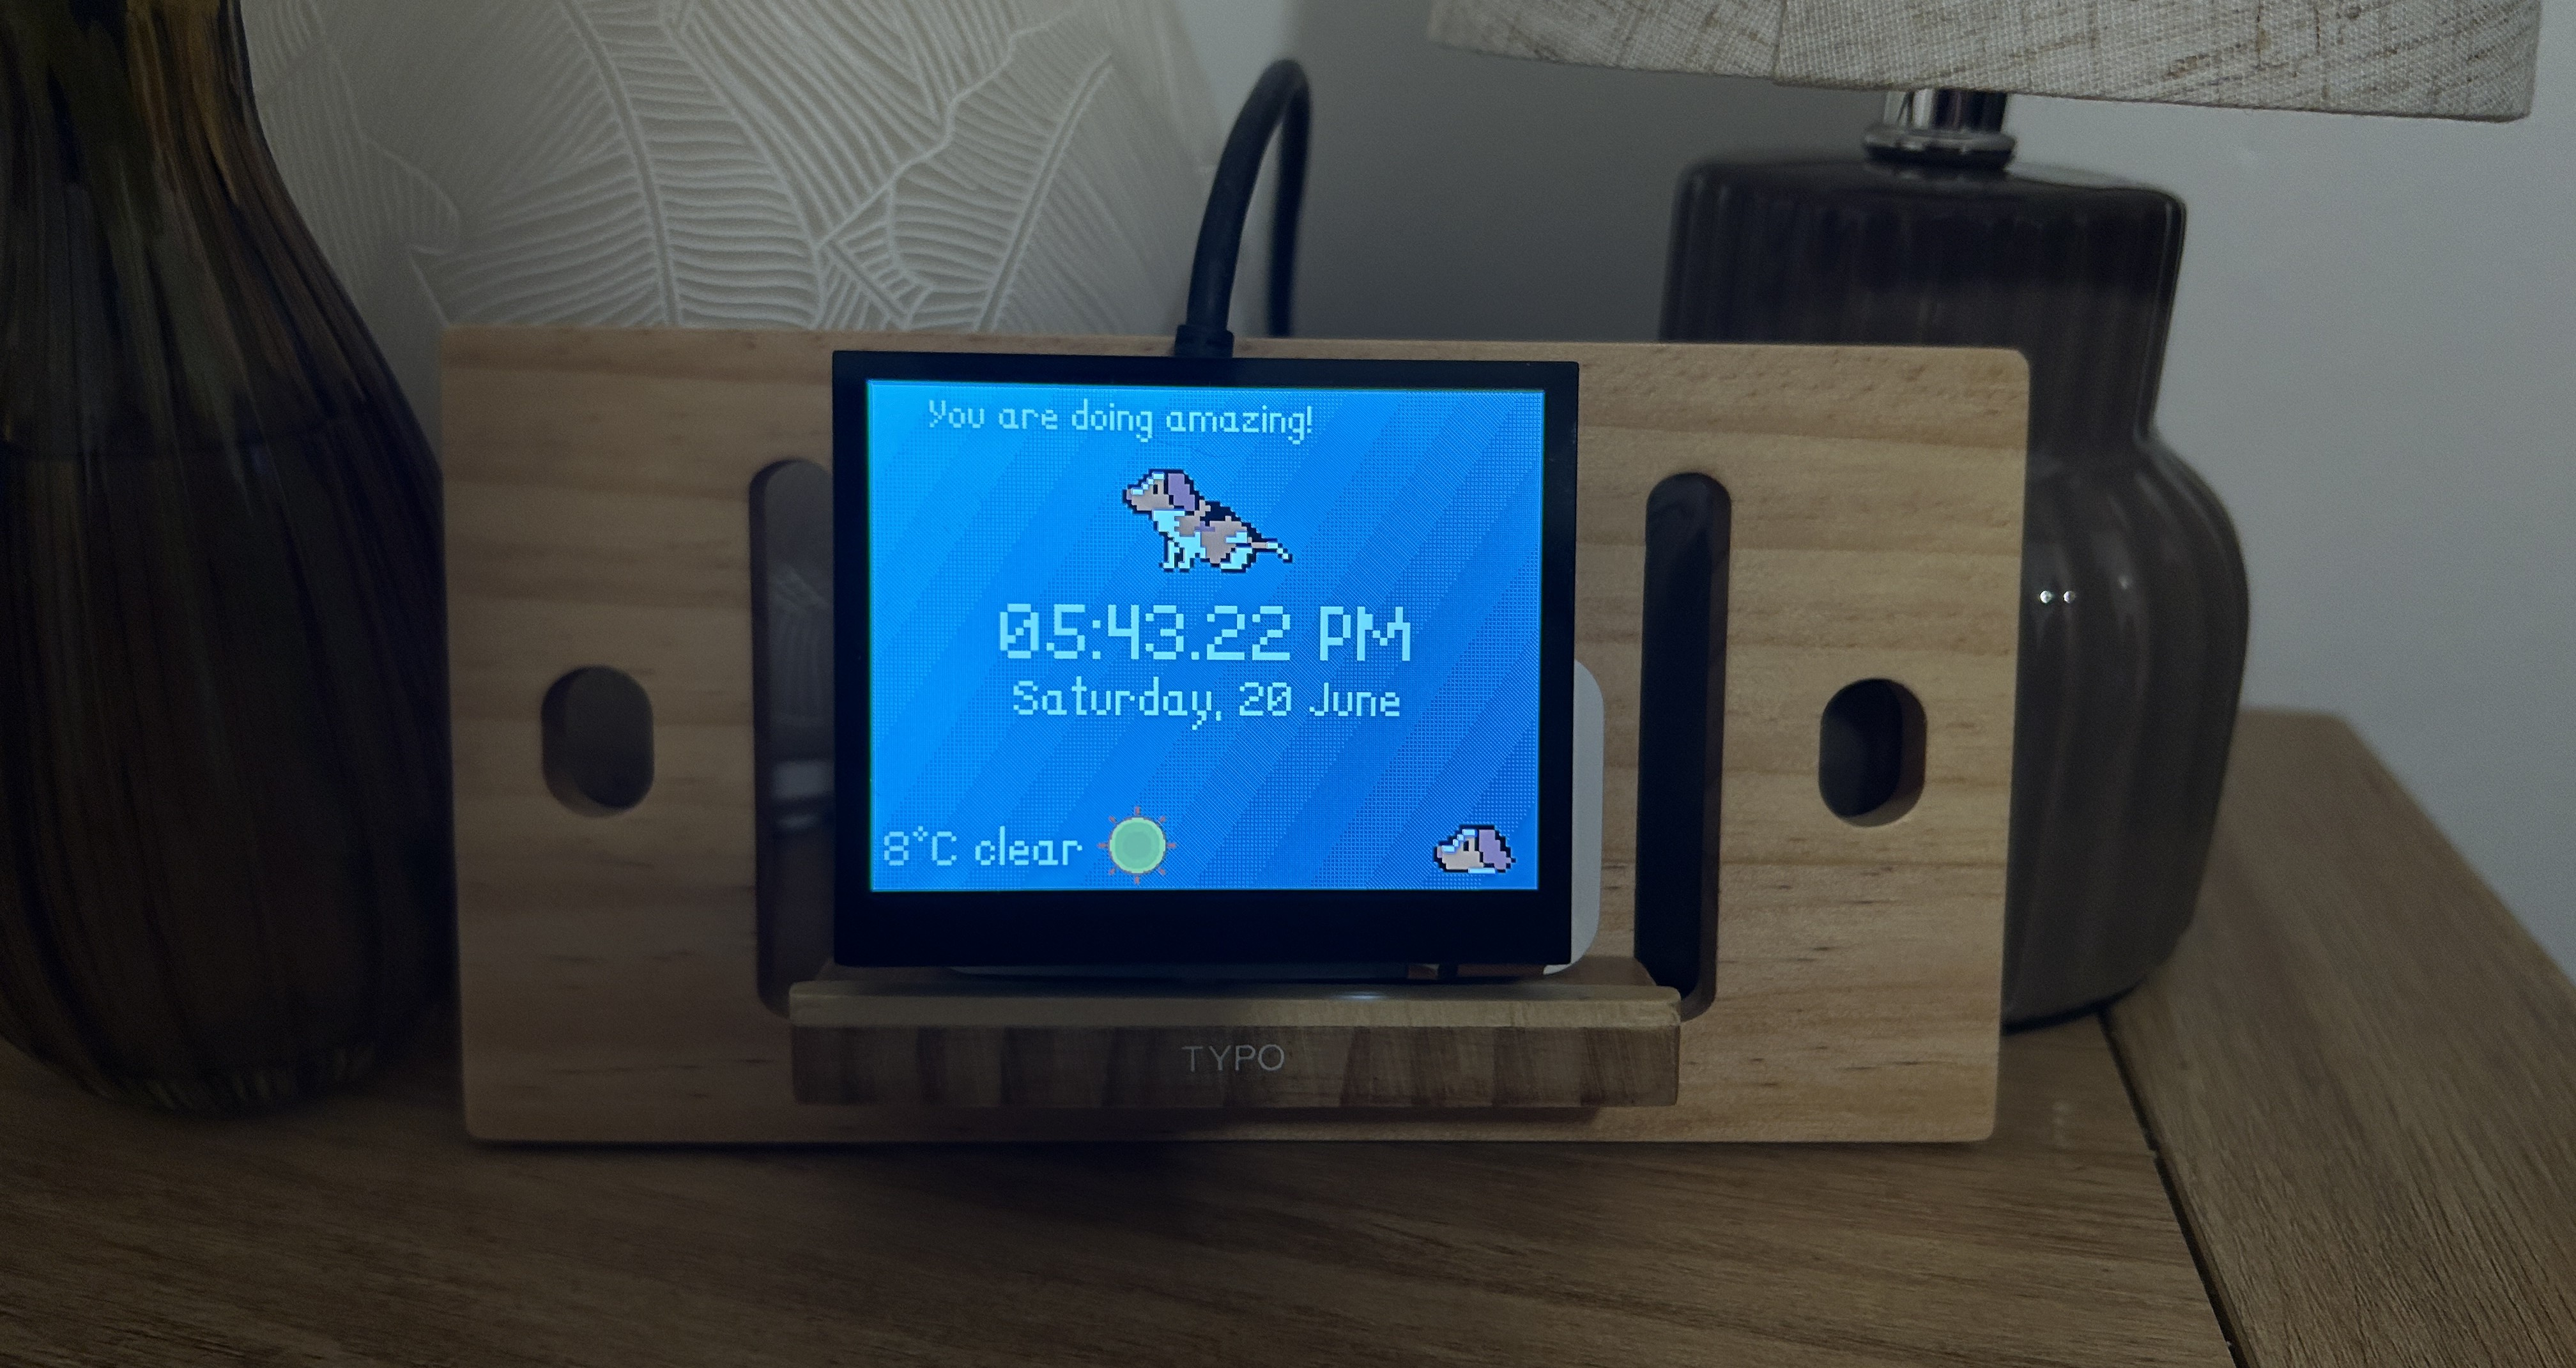
Creating an interactive clockface
After completing my last Pi project, which you can see here, I was keen to make another one. Pi Zero 2W’s are almost always out of stock and even while running Pi-hole, Unbound and WireGuard my previous project was only using around 3-4% of its CPU and RAM capacity so I decided to just use the same Pi again for this project.
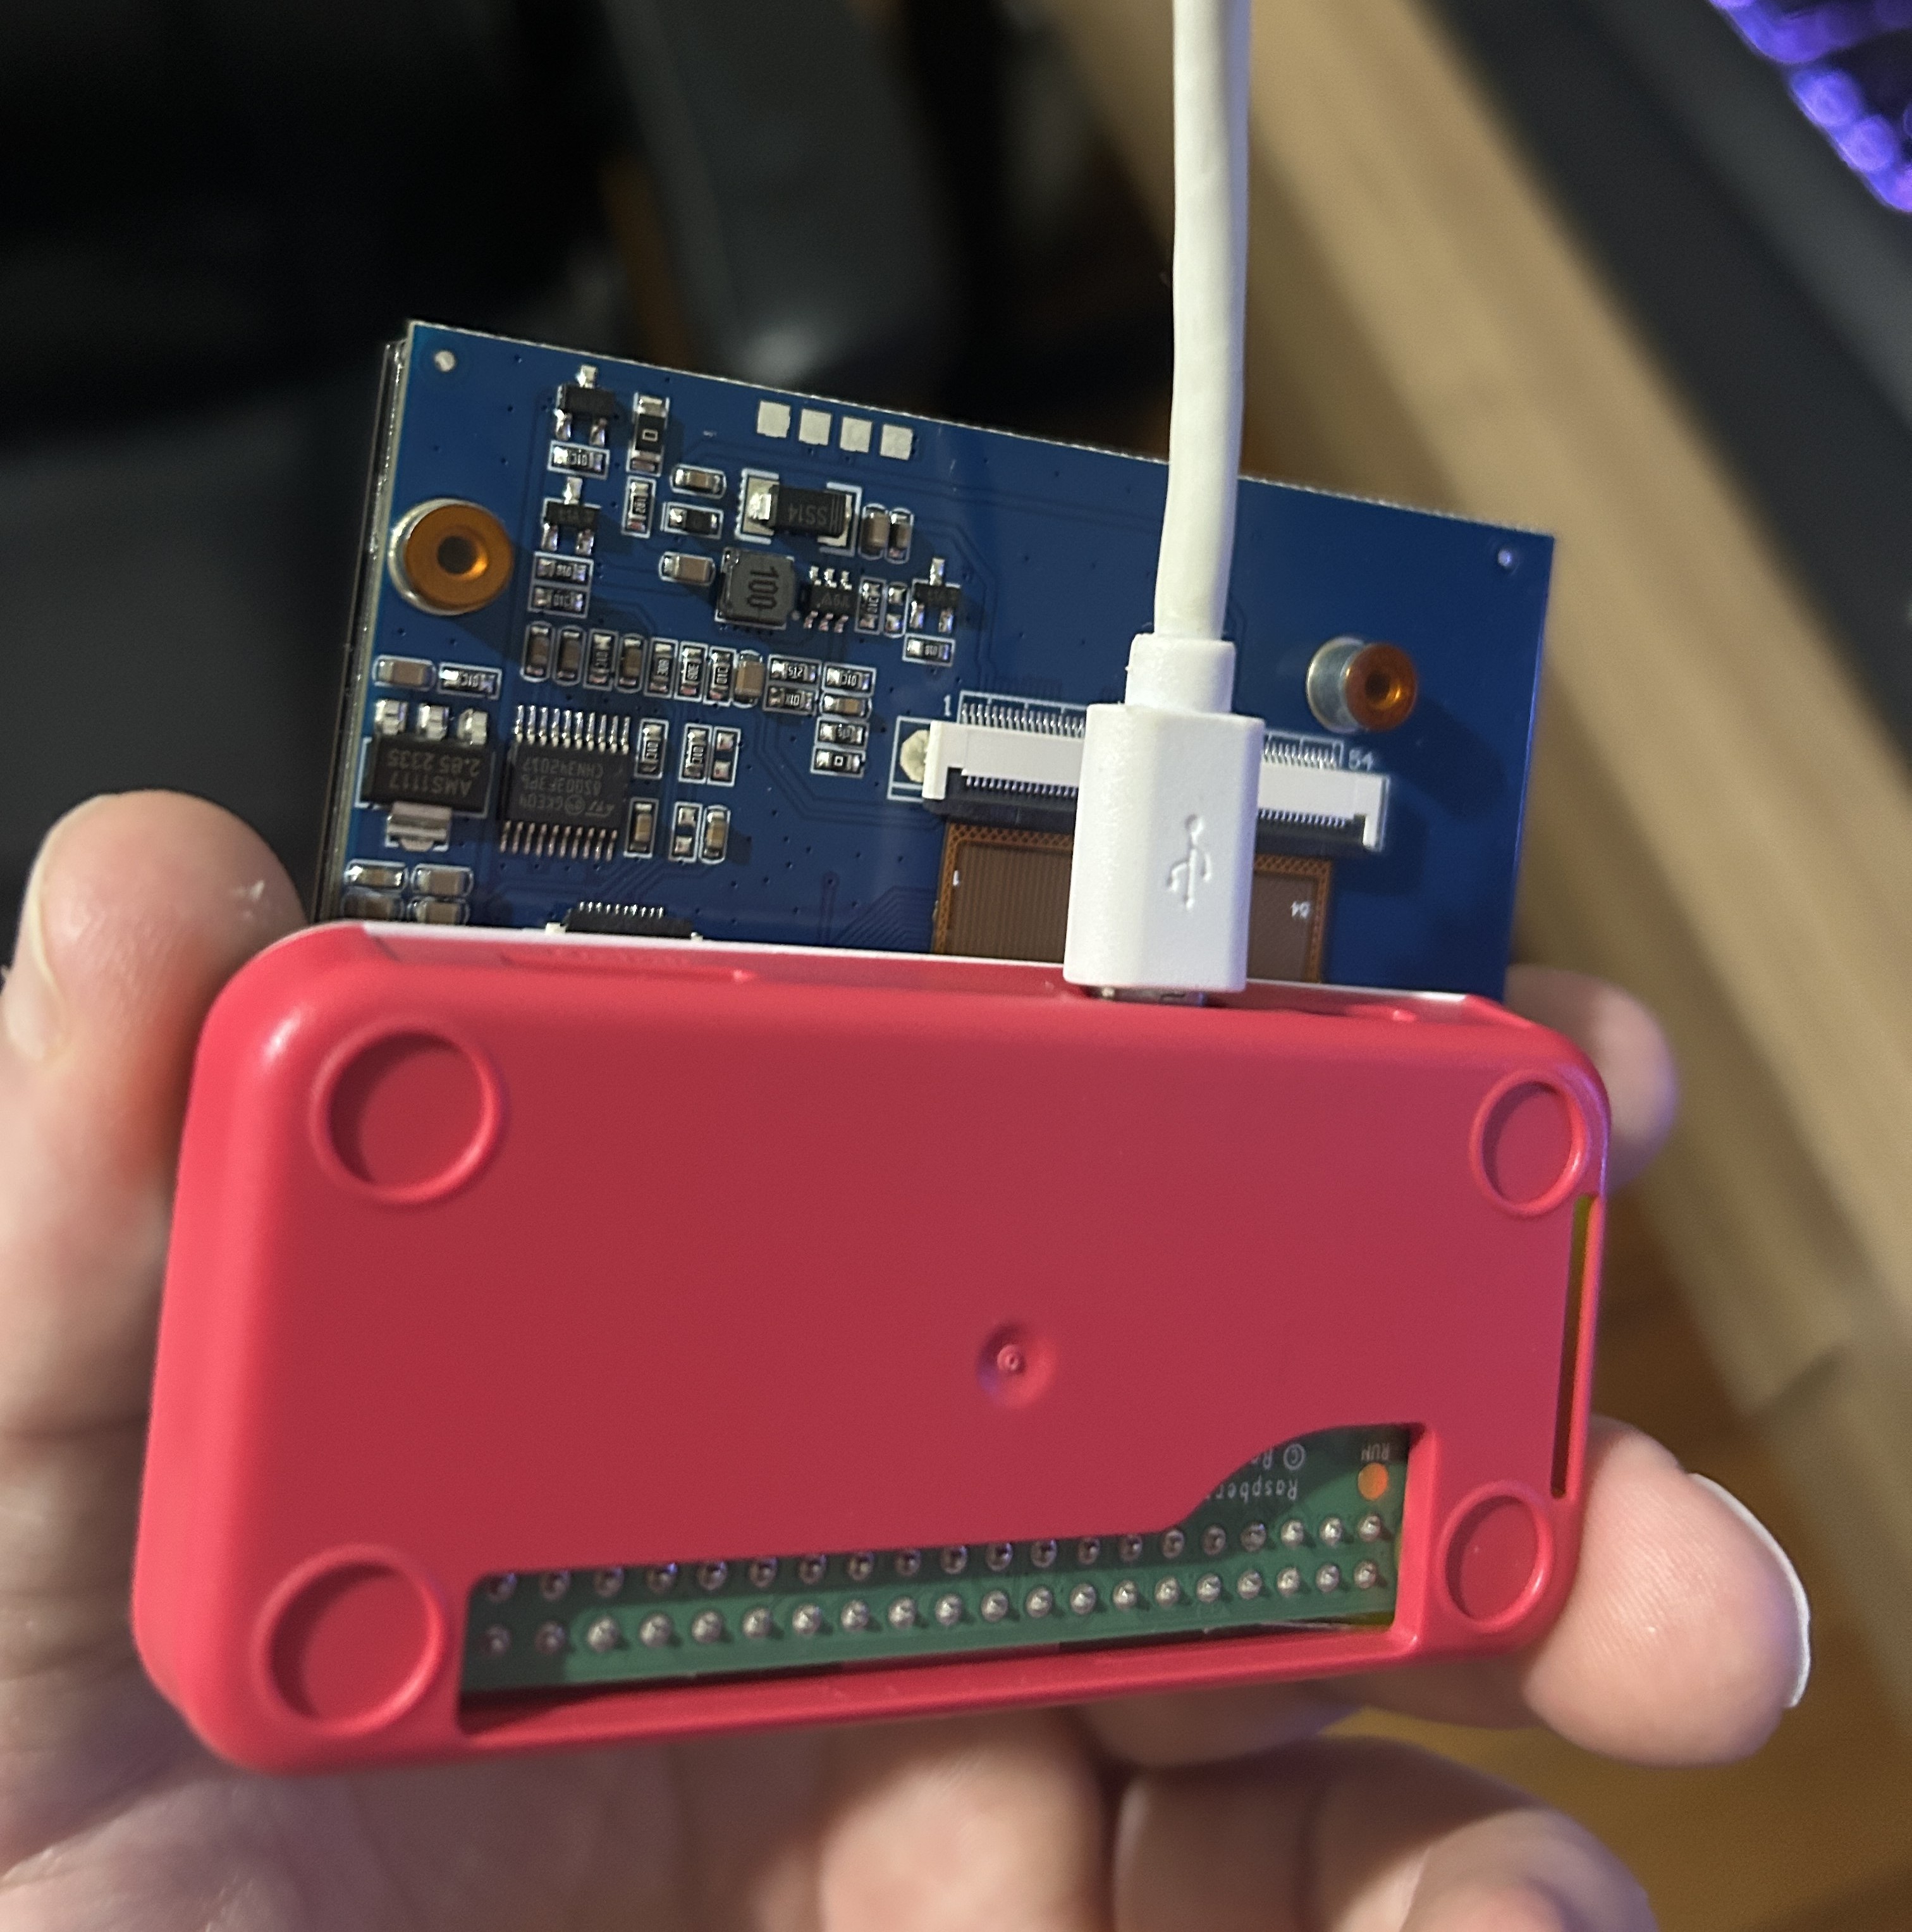
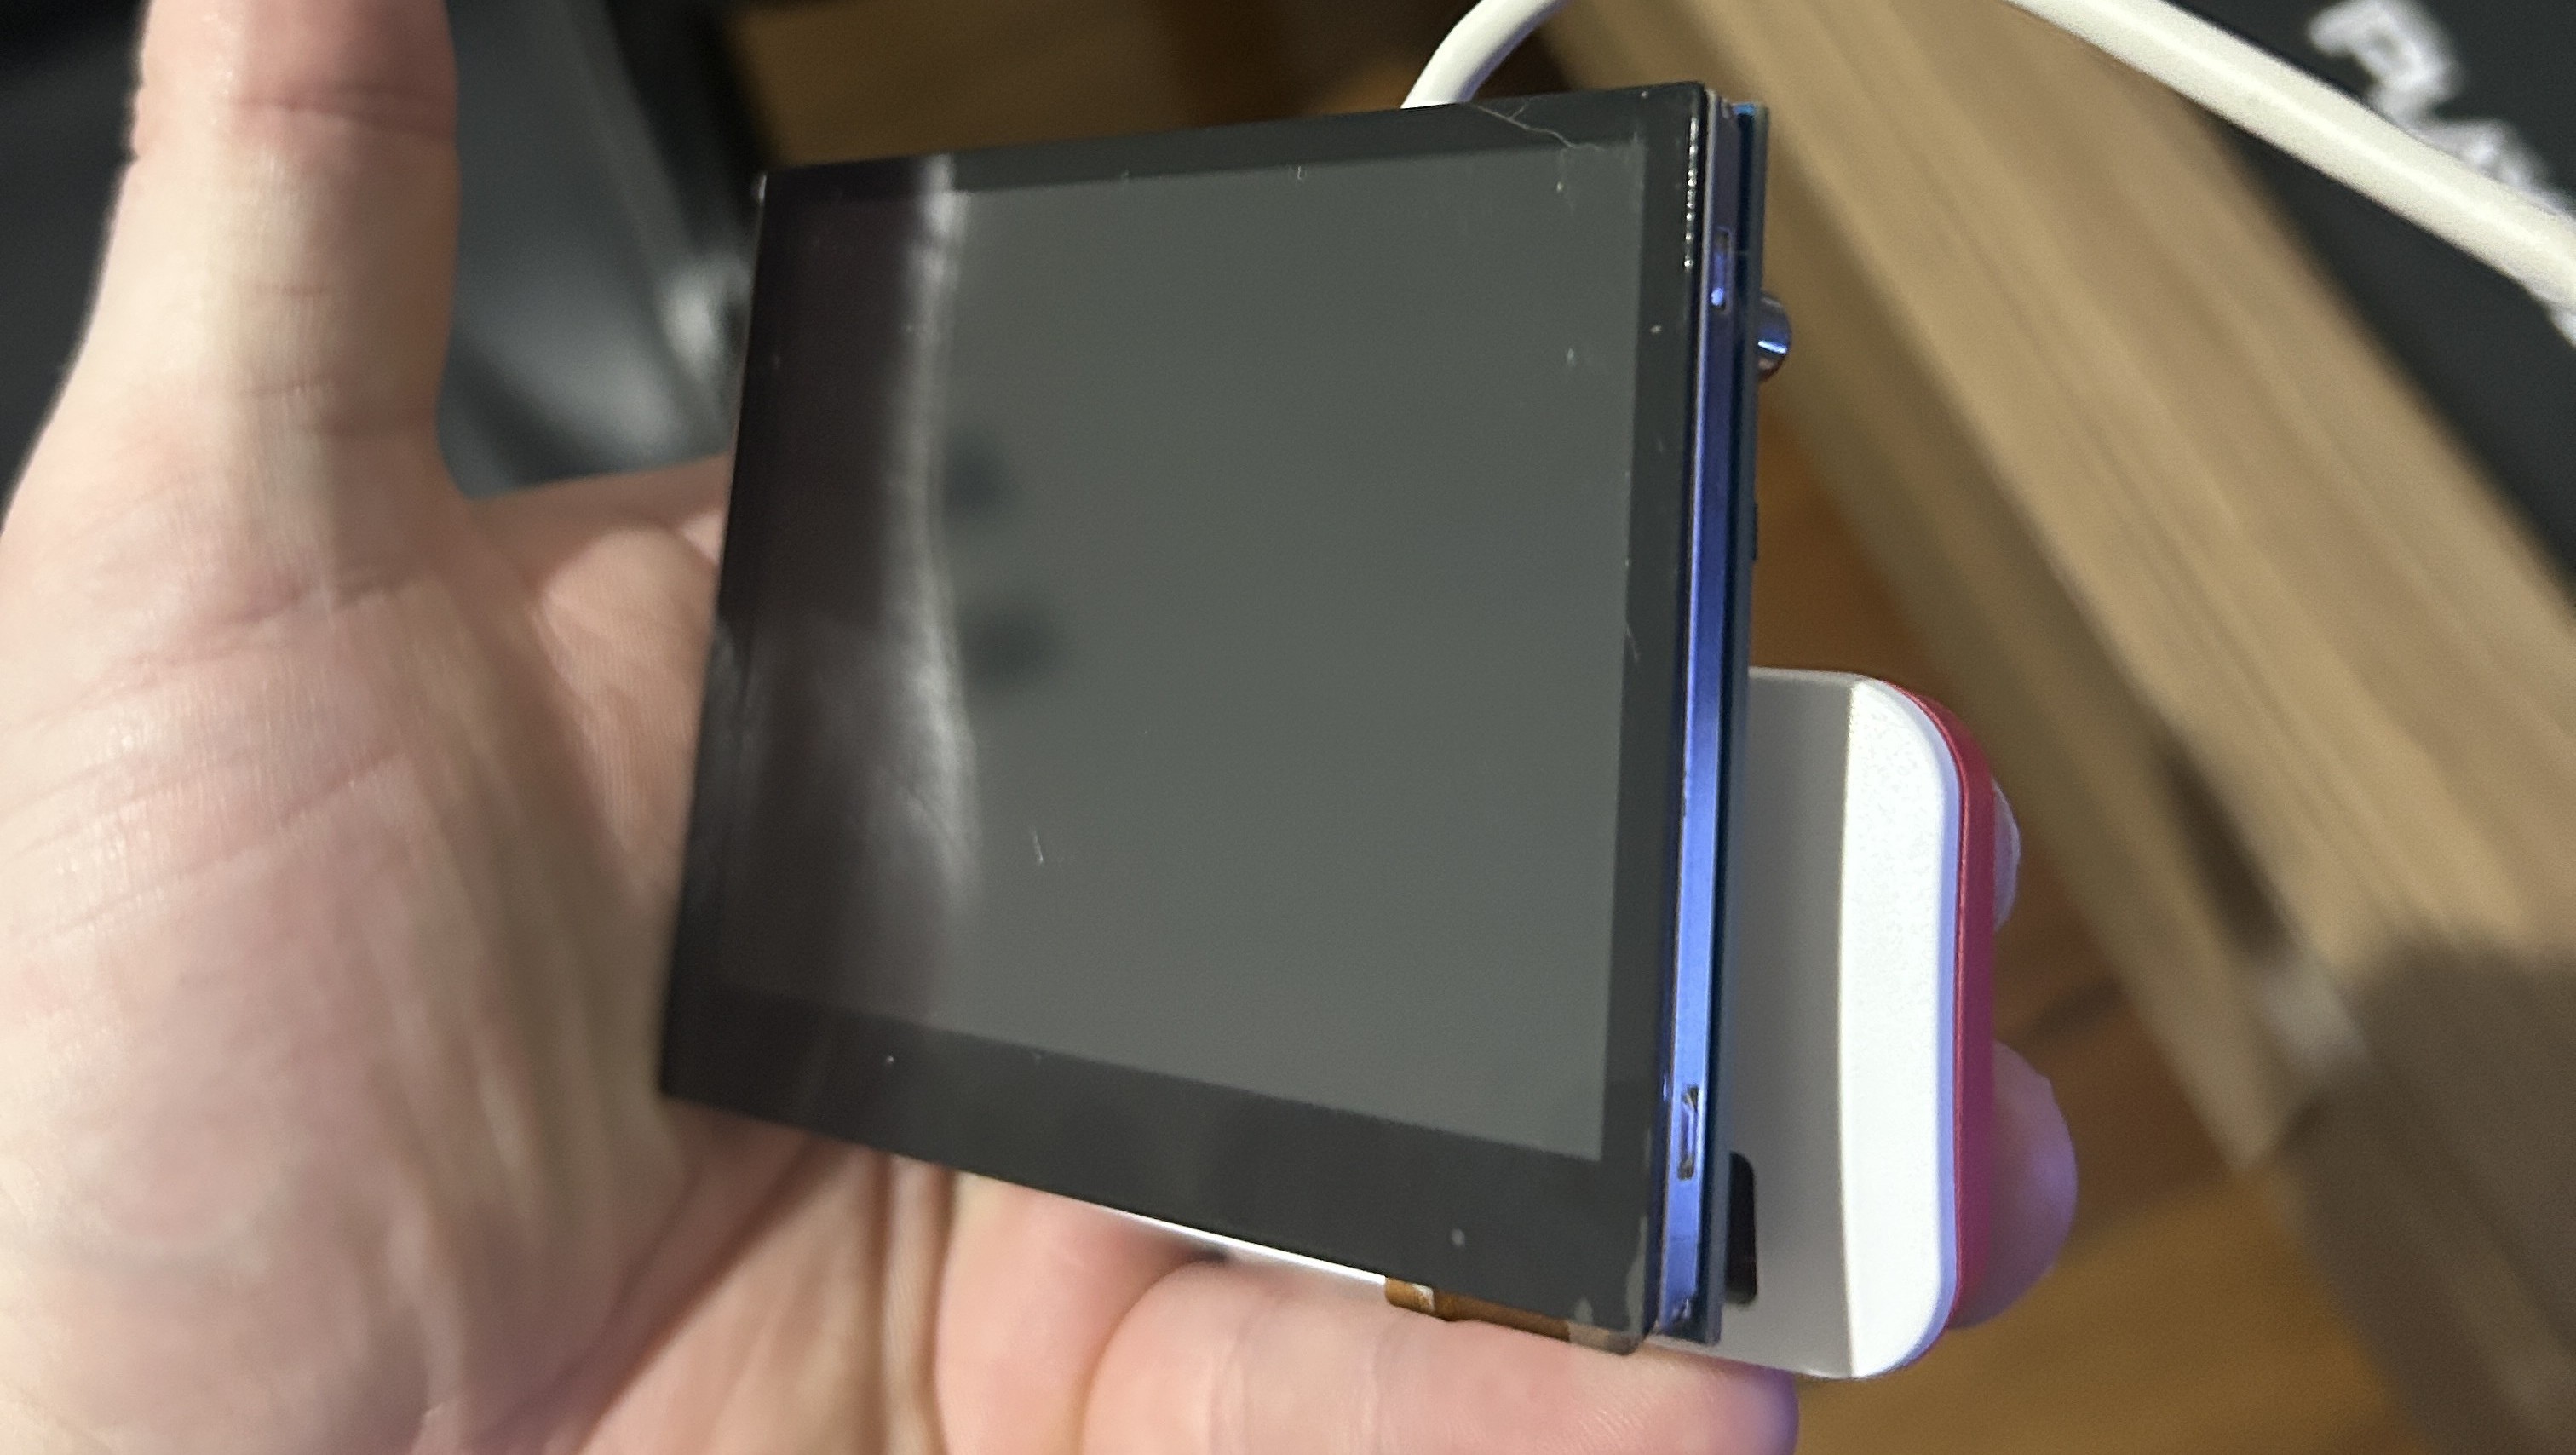
The idea for this project was to create a fun, interactive clockface for my girlfriend using some pixel art I made using Aseprite a while ago. My Pi Zero 2W from last time thankfully had pre-soldered header pins so I was able to go with a screen HAT that plugs straight onto the board, the WaveShare 3.5inch DPI LCD screen.
Screen Setup and Config
After attaching the screen HAT via the header pins I downloaded the DTBO file for this specific screen and extracted it directly to the pi home directory.
From there I copied the resulting extracted files to /boot/overlays with this command
sudo cp 3.5DPI-dtbo/*.dtbo /boot/overlays/Then added the following lines to my /boot/firmware/config.txt file as per the WaveShare wiki instructions here
dtoverlay=vc4-kms-v3d
dtoverlay=waveshare-35dpi
dtoverlay=waveshare-touch-35dpi
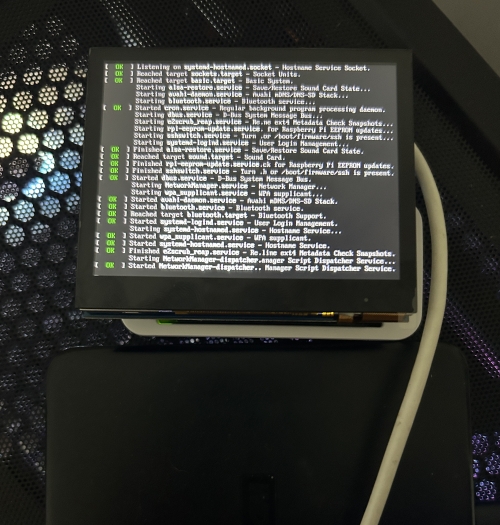
Now that all the drivers and dependencies were in place I ran sudo reboot and the screen came to life.
Pygame and Remote Code setup
For this project I am going to use Pygame, as I want to have animated sprites present on the screen with some touch interaction from the touchscreen.
So back in the pi terminal I ran the following install command:
sudo apt install python3-pygame python3-pillow python3-requests -yRather than coding the whole interface on my desktop and having to repeatedly copy the file over to the pi to test, I decided I wanted to edit the Python files on the Pi directly to streamline the process with real-time updates.
Moving over to VScode on my desktop, I installed the remote-SSH extension and added my Pi as a host, however I quickly found that the extension does not support the 32-bit OS I am running on my Pi anymore, so I went with SSH FS, an extension I have used before during uni web development classes.
After creating an SSH-FS configuration for the Pi and connecting, I was able to edit and create files on the Pi directly from VS code.
First Pygame code
With a newly established link to the Pi, I created a new folder in the home directory called clock_project and created the python file main.py.
Redscreen Test
With Pygame installed i created the following test code to see if i could get the screen to turn red
import pygame

#setup
pygame.init()
screen = pygame.display.set_mode((640, 480)) #establish display
clock = pygame.time.Clock()
running = True

while running:
    screen.fill("red")

    #flip() to show work on screen
    pygame.display.flip()

    #limit to 30fps
    clock.tick(30)

pygame.quit()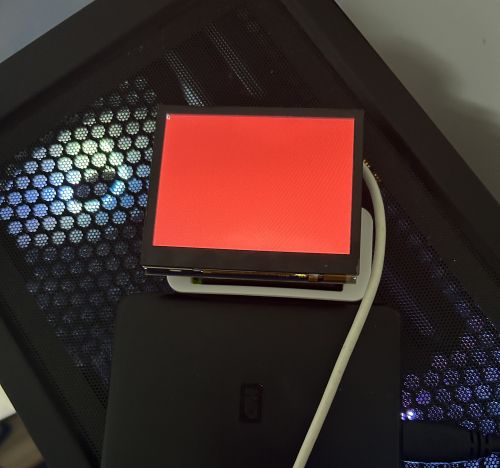
So far so good.
Visualising the time
Now that the screen was working i imported the datetime library and used it to generate a local time variable.
current_time = datetime.now() #grab current local time
time_string=current_time.strftime("%H:%M:%S") #format time as string
From there I needed to render the newly created string using a defined font, and a defined rect object to position it.
font = pygame.font.SysFont("consolas", 60)
time_surf = font.render(time_string, True, "red")
time_rect = time_surf.get_rect(center=(320, 240))
With these variables defined i then needed to blit the font to the screen display I defined earlier using the following code structure:
destination_surface.blit(source_surface, position)Note: blit is a method that copies pixels from one surface onto another (generally used for images and text), in this case we are copying pixels from the new time interface (source surface) to the screen display (destination surface) at time_rect (position) which will be the centre of the screen. `screen.blit(time_surf, time_rect)`
Here is the full code up to this point and an image of the current display
import pygame
from datetime import datetime

#setup
pygame.init()
screen = pygame.display.set_mode((640, 480)) #establish display
clock = pygame.time.Clock() #set up clockrate
pygame.mouse.set_visible(False) #hide cursor
running = True #runtime boolean


font = pygame.font.SysFont("consolas", 60) #initialiase sys font and sizing

while running:


    current_time = datetime.now() #grab current local time

    time_string=current_time.strftime("%H:%M:%S") #format time as string


    screen.fill("black") #clear screen

    time_surf = font.render(time_string, True, "red") #font formatting for time
    time_rect = time_surf.get_rect(center=(320, 240)) #centre alignment of the clockface on the HAT display


    screen.blit(time_surf, time_rect) #draw text surface on display window surface (screen)


    pygame.display.flip() #flip() to show work on screen

    clock.tick(30) #limit to 30fps

pygame.quit()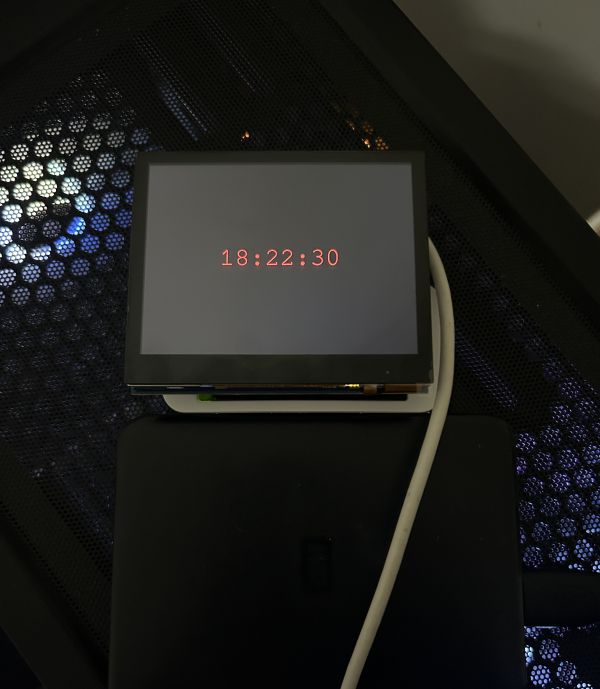
12-hour time looks nicer for these kinds of clocks, so i changed the time string to:
time_string=current_time.strftime("%I:%M.%S %p")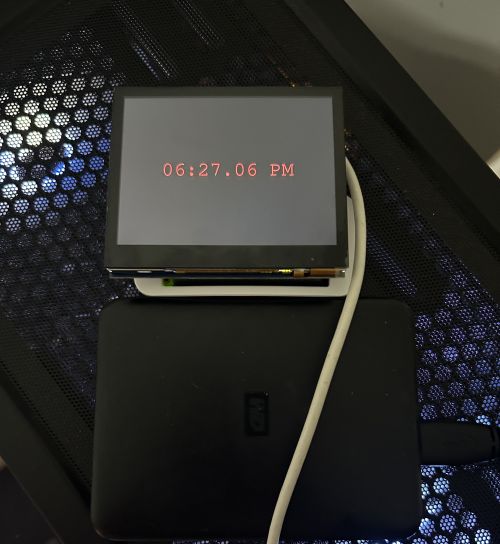
Adding an image
To add some pixel art to the screen, i first created an assets folder in the clock_project folder and copied a png of a sprite to it, from there i used Pygames inbuilt image loading method to load the image, wrapped the import in a scale transform as the original image was only 64x64, then used the same rect method to centre the image and blit it to the screen.
ruger = pygame.transform.scale(pygame.image.load('assets/Rugerhead.png'), (300,300))
dog_rect = ruger.get_rect(center=(320, 100))
screen.blit(ruger, dog_rect)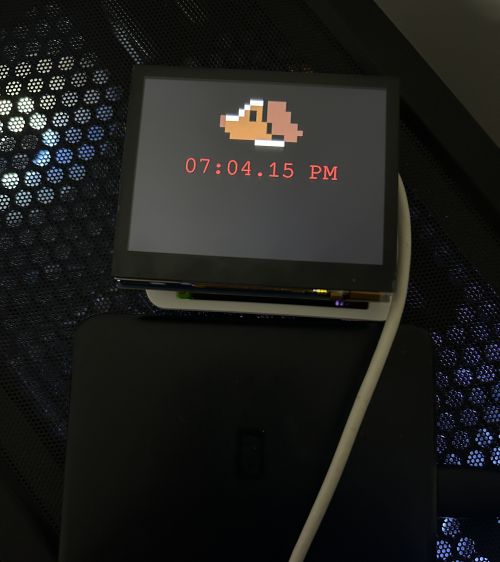
Adding an animation
From there i added a 4 frame sprite sheet to the assets folder
Just like with the static image previously introduced we use pygame.image.load to pull the sprite sheet from the assets folder
sheet = pygame.image.load("assets/ruger-sprint.png")Next I set some config variables for the animation: width, height and number of frames.
frame_width = 64
frame_height = 64
num_frames = 4
Note: Remember all these sprite images are tiny, I will use pygame.transform later to upscale them
The next step is to slice the spritesheet into into 4 individual images to render as frames, using our num_frames variable from before as the range.
#slice each frame to a list so we can cycle through it
frames = []
for i in range(num_frames):
    frame=sheet.subsurface((i * frame_width, 0, frame_width, frame_height))
    frames.append(frame)
Then I created some config variables for the animation itself
current_frame = 0
animation_speed = 3
frame_timer = 0
With the previous setup done, I added some code to the main running loop to run the animation.
#animate the spritesheet list for running dog sprite
    frame_timer += 1
    if frame_timer >= animation_speed:
        frame_timer = 0
        current_frame = (current_frame + 1) % len(frames)

    screen.blit(frames[current_frame], (320, 400)) #blit the current frame to the screen
It worked but it was far too small, I used pygame.transform.scale to fix it
#running animation config
frame_width = 64
frame_height = 64
num_frames = 4
scale_factor = 3

#slice each frame to a list so we can cycle through it
frames = []
for i in range(num_frames):
    frame=sheet.subsurface((i * frame_width, 0, frame_width, frame_height))
    frame= pygame.transform.scale(frame, (frame_width * scale_factor, frame_height * scale_factor))
    frames.append(frame)
Custom Font
I decided to lean into the retro pixel art style some more and went with the lanapixel font
Thankfully Pygame makes importing fonts very easy, all i needed to do was add a ttf file to the assets folder then change my current font definition to:
ont = pygame.font.Font("assets/LanaPixel_NoKorean.ttf", 60)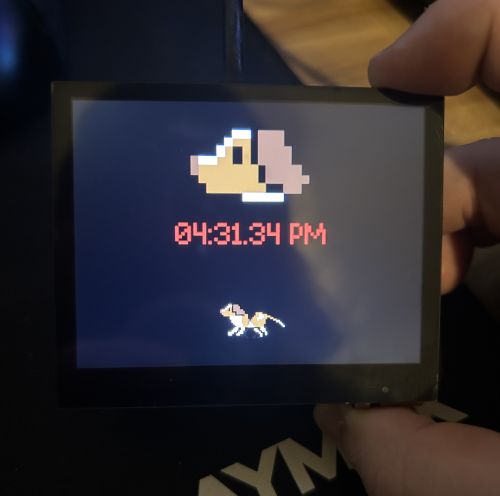
Nice!
Touchscreen config
At this point I wanted to test the touchscreen so i ran:
sudo evtest /dev/input/event2The test was a success, with the terminal returning the following when I tapped the screen
Event: time 1781333712.719068, -------------- SYN_REPORT ------------
Event: time 1781333712.838946, type 3 (EV_ABS), code 48 (ABS_MT_TOUCH_MAJOR), value 52
Event: time 1781333712.838946, type 3 (EV_ABS), code 50 (ABS_MT_WIDTH_MAJOR), value 52
After confirming the touch functionality was working, I wanted to get it configured with Pygame and test it, according to the Pygame docs, when Pygame 2 was released, they added a FINGERDOWN method to use in place of MOUSEBUTTONDOWN. In the main loop i added an event listener that prints the X and Y coordinate of a touchscreen event.
for event in pygame.event.get():
	if event.type == pygame.QUIT:
		running = False
	if event.type == pygame.FINGERDOWN:
		print(event.x, event.y)
Backgrounds
Instead of messing around trying to render a gradient background in Pygame, which was going to require rendering 2x2 lines of pixels of varying shades to create the effect, I jumped into Aseprite and used the Gradient Tool with dithering effect to create some cool pixelated gradient backgrounds.


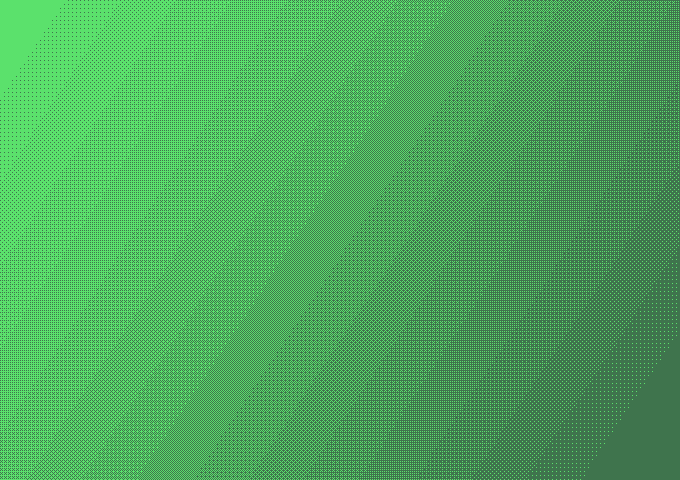

Then i defined background using one of them. and replaced the screen.fill("black") line in the running loop with a blit for the new background
background = pygame.image.load('assets/blue.png').convert()Note: convert() ensures the imported backgrounds match the pixel format of the Pygame display
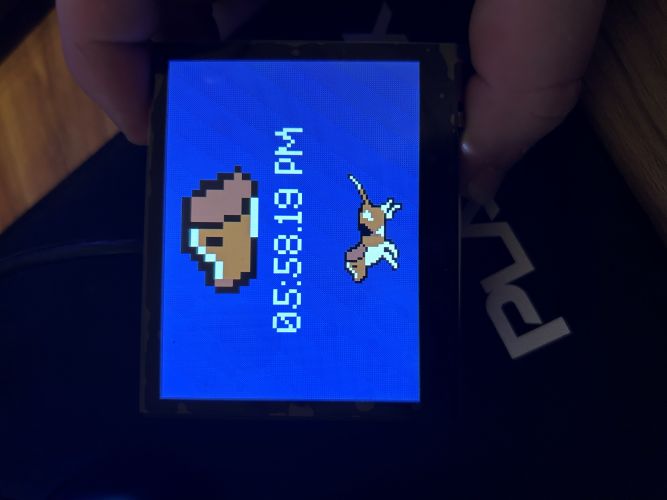
Refactoring
At this point things were messy and I separated everything into individual functions to tidy up the main loop and make editing modular.
import pygame
from datetime import datetime

##############################
###### Functions #############
##############################

def prep_assets():
    """
    import and resize assets
    """
    ruger = pygame.transform.scale(pygame.image.load('assets/Rugerhead.png'), (300,300)) #static dog sprite
    sheet = pygame.image.load("assets/ruger-sprint.png") #load spritehseet for running animation
    background = pygame.image.load('assets/darkblue.png').convert()
    font = pygame.font.Font("assets/LanaPixel_NoKorean.ttf", 80) #initialiase sys font and sizing
    return ruger, sheet, background, font

def load_frames(sheet, frame_width, frame_height, num_frames, scale_factor):
    """
    prepare frame slices for dog running animation
    """
    #slice each frame to a list so we can cycle through it
    frames = []
    for i in range(num_frames):
        frame=sheet.subsurface((i * frame_width, 0, frame_width, frame_height))
        frame= pygame.transform.scale(frame, (frame_width * scale_factor, frame_height * scale_factor))
        frames.append(frame)
    return frames

def draw_clock(screen, font):
    """
    Draw realtime clockface onto screen
    """
    current_time = datetime.now() #grab current local time
    time_string=current_time.strftime("%I:%M.%S %p") #format time as string
    time_surf = font.render(time_string, True, "white") #font formatting for time
    time_rect = time_surf.get_rect(center=(320, 240)) #centre alignment of the clockface on the HAT display
    screen.blit(time_surf, time_rect) #draw text surface on display window surface (screen)

def draw_dog(screen, ruger):
    """
    Draw static pixel art dog face
    """
    dog_rect = ruger.get_rect(center=(320, 100)) #position the sprite just above the clockface
    screen.blit(ruger, dog_rect) #blit the sprite onto the screen


def update_animation(frame_timer, current_frame, frames, animation_speed):
    """
    Cycle animation frames for dog running
    """
    #animate the spritesheet list for running dog sprite
    frame_timer += 1
    if frame_timer >= animation_speed:
        frame_timer = 0
        current_frame = (current_frame + 1) % len(frames)
    return frame_timer, current_frame

def draw_anim(screen, frames, current_frame):
    """
    Draw current frame from update_animation() onto screen
    """
    frame_rect = frames[current_frame].get_rect(center=(320, 400)) #rectanle to centre running animation
    screen.blit(frames[current_frame], frame_rect) #blit the current frame to the screen

##############################
###### setup #################
##############################
pygame.init()
screen = pygame.display.set_mode((640, 480)) #establish display
clock = pygame.time.Clock() #set up clockrate
pygame.mouse.set_visible(False) #hide cursor
running = True #runtime boolean

#running animation config
frame_width = 64
frame_height = 64
num_frames = 4
scale_factor = 5

ruger, sheet, background, font = prep_assets()
frames = load_frames(sheet, frame_width, frame_height, num_frames, scale_factor)

#animation timing values
current_frame = 0
animation_speed = 2
frame_timer = 0


##############################
###### main loop #############
##############################

while running:

    for event in pygame.event.get():
        if event.type == pygame.QUIT:
            running = False
        if event.type == pygame.FINGERDOWN:
            print(event.x, event.y)

    screen.blit(background, (0,0)) #set BG
    draw_clock(screen,font)
    draw_dog(screen, ruger)
    frame_timer, current_frame = update_animation(frame_timer, current_frame, frames, animation_speed)
    draw_anim(screen, frames, current_frame)

    pygame.display.flip() #flip() to show work on screen
    clock.tick(30) #limit to 30fps

pygame.quit()
Settings menu
I decided instead of hardcoding a background image I wanted to implement a simple settings menu that allows you to choose what background you want.
The first major step in doing this was to allocate all the existing code I had done for the clockface to its own class, as a common way of creating multiple screens in Pygame is to define each one as a class.
class ClockScreen:

    def __init__(self):
        """
        import and resize assets, __init__ function
        """
        self.ruger = pygame.transform.scale(pygame.image.load('assets/Rugerhead.png'), (300,300)) #static dog sprite
        self.sheet = pygame.image.load("assets/ruger-sprint.png") #load spritehseet for running animation
        self.background = pygame.image.load('assets/darkblue.png').convert()
        self.font = pygame.font.Font("assets/LanaPixel_NoKorean.ttf", 80) #initialiase sys font and sizing
        self.frames = self.load_frames()

        #animation timing values
        self.current_frame = 0
        self.animation_speed = 2
        self.frame_timer = 0

    def load_frames(self):
        """
        prepare frame slices for dog running animation
        """
        #slice each frame to a list so we can cycle through it
        frames = []
        for i in range(4):
            frame=self.sheet.subsurface((i * 64, 0, 64, 64))
            frame= pygame.transform.scale(frame, (64 * 5, 64 * 5))
            frames.append(frame)
        return frames

    def event_handler(self,events):
        """
        Event handler for this classs
        """
        for event in events:
            if event.type == pygame.QUIT:
                return "quit"
            if event.type == pygame.FINGERDOWN:
                print(event.x, event.y)
        return None

    def draw_clock(self, screen):
        """
        Draw realtime clockface onto screen
        """
        current_time = datetime.now() #grab current local time
        time_string=current_time.strftime("%I:%M.%S %p") #format time as string
        time_surf = self.font.render(time_string, True, "white") #font formatting for time
        time_rect = time_surf.get_rect(center=(320, 240)) #centre alignment of the clockface on the HAT display
        screen.blit(time_surf, time_rect) #draw text surface on display window surface (screen)

    def draw_dog(self, screen):
        """
        Draw static pixel art dog face
        """
        dog_rect = self.ruger.get_rect(center=(320, 100)) #position the sprite just above the clockface
        screen.blit(self.ruger, dog_rect) #blit the sprite onto the screen


    def update_animation(self):
        """
        Cycle animation frames for dog running
        """
        #animate the spritesheet list for running dog sprite
        self.frame_timer += 1
        if self.frame_timer >= self.animation_speed:
            self.frame_timer = 0
            self.current_frame = (self.current_frame + 1) % len(self.frames)

    def draw_anim(self, screen):
        """
        Draw current frame from update_animation() onto screen
        """
        frame_rect = self.frames[self.current_frame].get_rect(center=(320, 400)) #rectanle to centre running animation
        screen.blit(self.frames[self.current_frame], frame_rect) #blit the current frame to the screen

    def update(self):
        """
        Update screen for animations etc
        """
        self.update_animation()

    def draw(self, screen):
        """
        Draw all the defined items for the class
        """
        screen.blit(self.background, (0,0)) #set BG
        self.draw_clock(screen)
        self.draw_dog(screen)
        self.draw_anim(screen)
Then the main running loop becomes:
##############################
###### setup #################
##############################
pygame.init()
screen = pygame.display.set_mode((640, 480)) #establish display
clock = pygame.time.Clock() #set up clockrate
pygame.mouse.set_visible(False) #hide cursor
running = True #runtime boolean


##############################
###### main loop #############
##############################

scenes = {
    "clock": ClockScreen()
}
current_scene = scenes["clock"]

while True:
    events = pygame.event.get()
    next_scene = current_scene.event_handler(events)
    if next_scene:
        current_scene = scenes[next_scene]
    current_scene.update()
    current_scene.draw(screen)
    pygame.display.flip() #flip() to show work on screen
    clock.tick(30) #limit to 30fps
Next i made a new class for the settings menu screen and created its __init__ function to set the class elements up and created an event_handler function.
def __init__(self, backgrounds, current_bg):
	self.backgrounds = backgrounds #shared list of backgrounds
	self.current_bg = current_bg # index of current selected background
	self.bg_names = ["blue", "dark blue"]  # display names matching the backgrounds list order
	self.font = pygame.font.Font("assets/LanaPixel_NoKorean.ttf", 40) #font for options

	self.spacing = 60  # pixels between each option
	self.option_y_positions = [180,260] # y pos for each BG option first sitting at 180, 2nd one sitting at 260

def event_handler(self, events):
    for event in events:
        if event.type == pygame.QUIT:
            return "quit", self.current_bg

        if event.type == pygame.FINGERDOWN:
            #convert 0-1.0 touch coords to actual screen pixels
            #event.x and event.y are builtin pygame features for FINGERDOWN, they give normalised coordinates 0.0-1.0 for x and y on the action
            tap_x = int(event.x * 640) #convert 0.0-1.0 to 0-640
            tap_y = int(event.y * 480) #convert 0.0-1.0 to 0-480

            #define area of screen to press to go back to clockface
            if tap_x < 80 and tap_y < 50:
                return "clock", self.current_bg #return "clock" (ClockFace class) and the current selected BG index

            for i, name in enumerate(self.bg_names):
                #calculate y on the fly, y = 200 + spacing value * index of BG option
                y = 200 + i * self.spacing
                if y <= tap_y <= y + 50: # if tap_y is within a certain threshold of the option
                    self.current_bg = i #set the current_bg to the current index that was clicked on
                    return "clock", self.current_bg #return to clockface with newly selected bg
    return None, self.current_bg
Note: The event handler for settings returns a tuple, the one in ClockFace does not, to avoid errors i changed the return value of ClockFace event_handler() to None, None
Since the main running loop calls update() i had to make an update function that does nothing, and create a draw function for the new screen visuals.
def update(self):
	pass

def draw(self, screen):
    screen.fill((20,20,20)) #overwrite the previous screen before drawing the new one
    title = self.font.render("background", True, "white") #title of the screen
    screen.blit(title, title.get_rect(center=(320, 100))) #blit the title using a rect position

    for i, name in enumerate(self.bg_names):
        #space each option evenly downward from y=200 in accordance with the touch areas
        y = 200 + i * self.spacing
        colour = (255, 255, 0) if i == self.current_bg else (255, 255, 255) #change color of option when its the one selected currently
        text = self.font.render(name, True, colour) #render the text
        screen.blit(text, text.get_rect(center=(320, y))) #blit the text at the y position of the option

    back = self.font.render("< back", True, "white") #text display for back button
    screen.blit(back, (10, 10))
With the setup for the settings menu done, I changed the main loop to make it all work and ClockFace needs to use current_bg in __init__ and draw() instead of the hardcoded value.
class ClockScreen:

    def __init__(self, backgrounds):
        """
        import and resize assets, __init__ function
        """
        self.ruger = pygame.transform.scale(pygame.image.load('assets/Rugerhead.png'), (300,300)) #static dog sprite
        self.sheet = pygame.image.load("assets/ruger-sprint.png") #load spritehseet for running animation
        self.backgrounds = backgrounds
        self.current_bg = 0
        self.font = pygame.font.Font("assets/LanaPixel_NoKorean.ttf", 80) #initialiase sys font and sizing
        self.frames = self.load_frames()

        #animation timing values
        self.current_frame = 0
        self.animation_speed = 2
        self.frame_timer = 0

    def draw(self, screen):
        """
        Draw all the defined items for the class
        """
        screen.blit(self.backgrounds[self.current_bg], (0,0)) #set BG to current selection
        self.draw_clock(screen)
        self.draw_dog(screen)
        self.draw_anim(screen)

while True:
    events = pygame.event.get()
    next_scene, new_bg = current_scene.event_handler(events)
    if new_bg is not None: #if we get a new_bg input allocate it
        scenes["clock"].current_bg = new_bg
    if next_scene:
        current_scene = scenes[next_scene]
    current_scene.update()
    current_scene.draw(screen)
    pygame.display.flip() #flip() to show work on screen
    clock.tick(30) #limit to 30fps
At this stage I chose to make the event to trigger the settings screen, a finger tap in the bottom-right of the screen. here is the full code up to this point and the result.
import pygame
from datetime import datetime

##############################
###### Classes ###############
##############################
class ClockScreen:

    def __init__(self, backgrounds):
        """
        import and resize assets, __init__ function
        """
        self.ruger = pygame.transform.scale(pygame.image.load('assets/Rugerhead.png'), (300,300)) #static dog sprite
        self.sheet = pygame.image.load("assets/ruger-sprint.png") #load spritehseet for running animation
        self.backgrounds = backgrounds
        self.current_bg = 0
        self.font = pygame.font.Font("assets/LanaPixel_NoKorean.ttf", 80) #initialiase sys font and sizing
        self.frames = self.load_frames()

        #animation timing values
        self.current_frame = 0
        self.animation_speed = 2
        self.frame_timer = 0


    def load_frames(self):
        """
        prepare frame slices for dog running animation
        """
        #slice each frame to a list so we can cycle through it
        frames = []
        for i in range(4):
            frame=self.sheet.subsurface((i * 64, 0, 64, 64))
            frame= pygame.transform.scale(frame, (64 * 5, 64 * 5))
            frames.append(frame)
        return frames

    def event_handler(self,events):
        """
        Event handler for this class
        """
        for event in events:
            if event.type == pygame.QUIT:
                return "quit", None
            if event.type == pygame.FINGERDOWN:
                tap_x = int(event.x * 640)
                tap_y = int(event.y * 480)
                if tap_x > 580 and tap_y > 440:
                    return "settings", None
        return None, None

    def draw_clock(self, screen):
        """
        Draw realtime clockface onto screen
        """
        current_time = datetime.now() #grab current local time
        time_string=current_time.strftime("%I:%M.%S %p") #format time as string
        time_surf = self.font.render(time_string, True, "white") #font formatting for time
        time_rect = time_surf.get_rect(center=(320, 240)) #centre alignment of the clockface on the HAT display
        screen.blit(time_surf, time_rect) #draw text surface on display window surface (screen)

    def draw_dog(self, screen):
        """
        Draw static pixel art dog face
        """
        dog_rect = self.ruger.get_rect(center=(320, 100)) #position the sprite just above the clockface
        screen.blit(self.ruger, dog_rect) #blit the sprite onto the screen


    def update_animation(self):
        """
        Cycle animation frames for dog running
        """
        #animate the spritesheet list for running dog sprite
        self.frame_timer += 1
        if self.frame_timer >= self.animation_speed:
            self.frame_timer = 0
            self.current_frame = (self.current_frame + 1) % len(self.frames)

    def draw_anim(self, screen):
        """
        Draw current frame from update_animation() onto screen
        """
        frame_rect = self.frames[self.current_frame].get_rect(center=(320, 400)) #rectanle to centre running animation
        screen.blit(self.frames[self.current_frame], frame_rect) #blit the current frame to the screen

    def update(self):
        """
        Update screen for animations etc
        """
        self.update_animation()

    def draw(self, screen):
        """
        Draw all the defined items for the class
        """
        screen.blit(self.backgrounds[self.current_bg], (0,0)) #set BG to current selection
        self.draw_clock(screen)
        self.draw_dog(screen)
        self.draw_anim(screen)

class SettingsScreen:

    def __init__(self, backgrounds, current_bg):
        """
        Initialise screen variables and elements
        """
        self.backgrounds = backgrounds #shared list of backgrounds
        self.current_bg = current_bg # index of current selected background
        self.bg_names = ["light blue", "dark blue", "green", "red"]  # display names matching the backgrounds list order
        self.font = pygame.font.Font("assets/LanaPixel_NoKorean.ttf", 40) #font for options

        self.spacing = 60  # pixels between each option
        self.option_y_positions = [180,260] # y pos for each BG option first sitting at 180, 2nd one sitting at 260

    def event_handler(self, events):
        """
        Handle the different events of the settings screen
        """
        for event in events:
            if event.type == pygame.QUIT:
                return "quit", self.current_bg

            if event.type == pygame.FINGERDOWN:
                #convert 0-1.0 touch coords to actual screen pixels
                #event.x and event.y are builtin pygame features for FINGERDOWN, they give normalised coordinates 0.0-1.0 for x and y on the action
                tap_x = int(event.x * 640) #convert 0.0-1.0 to 0-640
                tap_y = int(event.y * 480) #convert 0.0-1.0 to 0-480

                #define area of screen to press to go back to clockface
                if tap_x < 80 and tap_y < 50:
                    return "clock", self.current_bg #return "clock" (ClockFace class) and the current selected BG index

                for i, name in enumerate(self.bg_names):
                    #calculate y on the fly, y = 200 + spacing value * index of BG option
                    y = 200 + i * self.spacing
                    if y <= tap_y <= y + 50: # if tap_y is within a certain threshold of the option
                        self.current_bg = i #set the current_bg to the current index that was clicked on
                        return "clock", self.current_bg #return to clockface with newly selected bg
        return None, self.current_bg

    def update(self):
        pass

    def draw(self, screen):
        """
        Draw the established elements of settings menu onto the screen
        """
        screen.fill((20,20,20)) #overwrite the previous screen before drawing the new one
        title = self.font.render("background", True, "white") #title of the screen
        screen.blit(title, title.get_rect(center=(320, 100))) #blit the title using a rect position

        for i, name in enumerate(self.bg_names):
            #space each option evenly downward from y=200 in accordance with the touch areas
            y = 200 + i * self.spacing
            colour = (255, 255, 0) if i == self.current_bg else (255, 255, 255) #change color of option when its the one selected currently
            text = self.font.render(name, True, colour) #render the text
            screen.blit(text, text.get_rect(center=(320, y))) #blit the text at the y position of the option

        back = self.font.render("< back", True, "white") #text display for back button
        screen.blit(back, (10, 10))

##############################
###### setup #################
##############################
pygame.init()
screen = pygame.display.set_mode((640, 480)) #establish display
clock = pygame.time.Clock() #set up clockrate
pygame.mouse.set_visible(False) #hide cursor
running = True #runtime boolean

# BG options
backgrounds = [
    pygame.image.load('assets/lightblue.png').convert(),
    pygame.image.load('assets/darkblue.png').convert(),
    pygame.image.load('assets/green.png').convert(),
    pygame.image.load('assets/red.png').convert(),
]

##############################
###### main loop #############
##############################

scenes = {
    "clock": ClockScreen(backgrounds),
    "settings": SettingsScreen(backgrounds, 0)
}
current_scene = scenes["clock"]

while True:
    events = pygame.event.get()
    next_scene, new_bg = current_scene.event_handler(events)
    if new_bg is not None: #if we get a new_bg input allocate it
        scenes["clock"].current_bg = new_bg
    if next_scene:
        current_scene = scenes[next_scene]
    current_scene.update()
    current_scene.draw(screen)
    pygame.display.flip() #flip() to show work on screen
    clock.tick(30) #limit to 30fps
Weather implementation
Digital clocks commonly have weather information so i decided i would add some. After some searching i determined Open-Meteo was the best free weather information supplier that didn't require an API-key, as it just allows GET requests with given parameters to serve weather data.
To pull data from Open-Meteo i created a function in ClockFace to query and store the response data.
def get_weather():
    """
    Fetch current temp and weather code from open-meteo for given params
    """
    url = "https://api.open-meteo.com/v1/forecast"
    params = {
        "latitude": 0, #set to your local x,y coordinates
        "longitude": 0,
        "current_weather": True
    }
    response = requests.get(url, params=params, timeout=5) #get request using the url and given parameter dict
    data = response.json() # the response data dict
    weather = data["current_weather"] #weather = all data items in the "current_weather" bracket (should be temp, wind speed, weather code etc)
    return weather["temperature"], weather["weathercode"] #return temp and code from the pulled data
Next I mapped some of the common weather codes from Open-Meteo to plaintext weather names.
def weather_code_to_text(code):
    """Map Open-Meteo's numeric weather code to a simple description."""
    if code == 0:
        return "clear"
    elif code in [1, 2, 3]:
        return "cloudy"
    elif code in [45, 48]:
        return "foggy"
    elif code in [51, 53, 55, 61, 63, 65]:
        return "rainy"
    elif code in [71, 73, 75]:
        return "snowy"
    elif code in [95, 96, 99]:
        return "stormy"
    else:
        return "unknown"
From there I added a few more values to the __init__ function, added time based refresh of weather data to update() that queries every 10min, and created a draw_weather function to visually represent the data.
def __init__(self, backgrounds):
    ...
    self.weather_temp = None
    self.weather_code = None
    self.last_weather_check = 0
    self.weather_font = pygame.font.Font("assets/LanaPixel_NoKorean.ttf", 24)

def update(self):
"""
Update screen for animations etc
"""
self.update_animation()
if time.time() - self.last_weather_check > 600: # 10 min check window
    try:
        self.weather_temp, self.weather_code = get_weather()
    except:
        pass #just keep last request if new request fails
    self.last_weather_check = time.time()

def draw_weather(self, screen):
	"""
	Create a visual representation of the weather data
	"""
	if self.weather_temp is None:
		return #incase weather isnt loaded yet, skip

	weather_text = weather_code_to_text(self.weather_code) # text value mapping from weather code function
	display_string = f"{round(self.weather_temp)}°C {weather_text}" #string format temp: weather type

	weather_surface = self.weather_font.render(display_string, True, "white") #render the font
	screen.blit(weather_surface, (10,440)) #blit to the screen in bottom left corner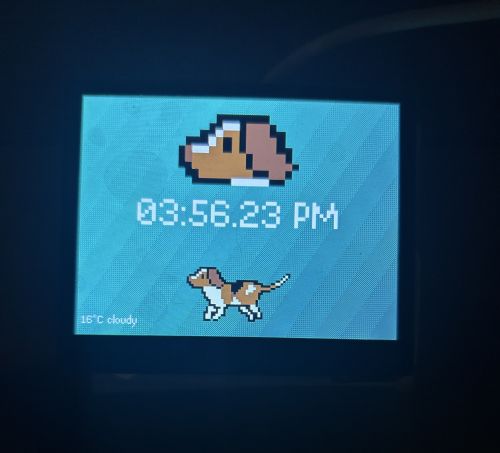
Nice!
Creating Weather Sprites
With the weather info looking a bit bland i decided to make some custom weather sprites in Aseprite so that they could be added to draw_weather() as part of the weather string output.


Then i imported them all into an icon dict in the __init__ function of ClockFace and used them in draw_weather()
def __init__(self, backgrounds):
    ...
    self.weather_icons = {
        "clear": pygame.image.load('assets/sun.png').convert(),
        "cloudy": pygame.image.load('assets/cloud.png').convert(),
        "rainy": pygame.image.load('assets/raincloud.png').convert(),
        "stormy": pygame.image.load('assets/stormcloud.png').convert(),
        "snowy": pygame.image.load('assets/snowcloud.png').convert(),
        "foggy": pygame.image.load('assets/fog.png').convert()
    }

def draw_weather(self, screen):
"""
Create a visual representation of the weather data
"""
if self.weather_temp is None:
    return #incase weather isnt loaded yet, skip

#create weather_text using relevant code-text entry
weather_text = weather_code_to_text(self.weather_code) # text value mapping from weather code function
display_string = f"{round(self.weather_temp)}°C {weather_text}" #string format temp: weather type

weather_surface = self.weather_font.render(display_string, True, "white") #render the font
screen.blit(weather_surface, (10,420)) #blit to the screen in bottom left corner
text_width = weather_surface.get_width() #grab text with for icon placement

#draw icon after text
icon = self.weather_icons.get(weather_text)
if icon:
    screen.blit(icon, (10 + text_width + 10, 400)) #10px gap after text width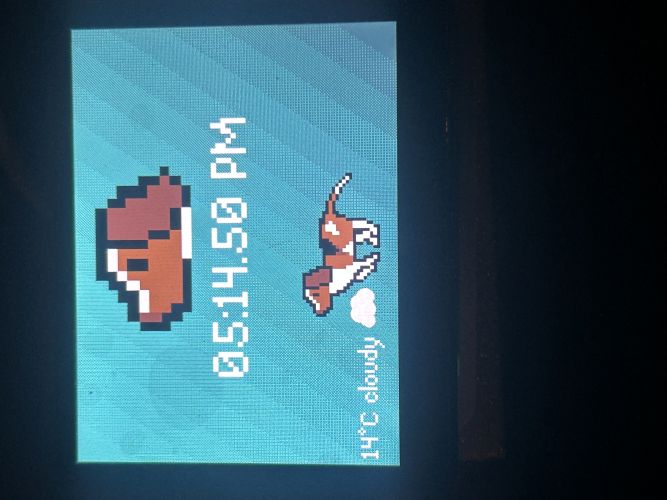
Dynamic and interactatble sprite
Next I wanted the sprite to be interactable and move to where the user tapped the screen
First I added some more variables to the __init__ function to define the sprite position, target position and movement speed. then i created an update position function to tween the sprite from its current x position to the tap target, and added the tap_x value designation to the event handler.
def __init__(self, backgrounds):
    #dog movement values
    self.dog_x = 320
    self.dog_target_x = 320
    self.dog_speed = 4

def update_dog_pos(self):
    """
    Move dog horizontally towards its target position
    """
    if self.dog_x < self.dog_target_x: #if tapped on pos x value
        self.dog_x += self.dog_speed
        if self.dog_x > self.dog_target_x: #avoid overshooting
            self.dog_x = self.dog_target_x
    elif self.dog_x > self.dog_target_x: #if tapped on neg x value
        self.dog_x -= self.dog_speed
        if self.dog_x < self.dog_target_x: #overshoot
            self.dog_x = self.dog_target_x

def event_handler(self,events):
	"""
	Event handler for this class
	"""
	for event in events:
		if event.type == pygame.QUIT:
			return "quit", None
		if event.type == pygame.FINGERDOWN:
			tap_x = int(event.x * 640)
			tap_y = int(event.y * 480)
			if tap_x > 580 and tap_y > 440:
				return "settings", None
			else:
				self.dog_target_x = tap_x
	return None, None
From there I made the x argument of in draw_anim() dynamic instead of hardcoded to allow the movement visually, and added a call to update_dog_pos() in update()
def draw_anim(self, screen):
	"""
	Draw current frame from update_animation() onto screen
	"""
	frame_rect = self.frames[self.current_frame].get_rect(center=(self.dog_x, 400)) #rectanle to centre running animation
	screen.blit(self.frames[self.current_frame], frame_rect) #blit the current frame to the screen

def update(self):
	"""
	Update screen for animations etc
	"""
	self.update_animation()
	self.update_dog_pos()
	if time.time() - self.last_weather_check > 600: # 10 min check window
		try:
			self.weather_temp, self.weather_code = get_weather()
		except:
			pass #just keep last request if new request fails
		self.last_weather_check = time.time()
It works... but I wanted the sprite to flip based on travel direction, thankfully pygame has an inbuilt flip function we can add straight to the draw function!
def draw_anim(self, screen):
	"""
	Draw current frame from update_animation() onto screen
	"""
	current = self.frames[self.current_frame]
	if self.dog_target_x > self.dog_x: #if target is to the right, flip sprite
		current = pygame.transform.flip(current, True, False)

	frame_rect = current.get_rect(center=(self.dog_x, 400)) #rectanle to centre running animation
	screen.blit(current, frame_rect) #blit the current frame to the screen
Adding more animations and tidying UI
Next I added an idle sitting animation for when the sprite wasn't moving. First i added more setup variables to __init__ and updated load_frames() to take a sheet and num_frames parameter so it could be reused for multiple animations.
def __init__(self, backgrounds):
	"""
	import and resize assets, __init__ function
	"""
	self.ruger = pygame.transform.scale(pygame.image.load('assets/Rugerhead.png'), (100,100)) #static dog sprite
	self.run_sheet = pygame.image.load("assets/ruger-sprint.png") #load spritehseet for running animation
	self.backgrounds = backgrounds
	self.current_bg = 0
	self.font = pygame.font.Font("assets/LanaPixel_NoKorean.ttf", 80) #initialiase sys font and sizing

	self.idle_sheet = pygame.image.load("assets/sit.png")
	self.idle_frames = self.load_frames(self.idle_sheet, 4)
	self.run_frames = self.load_frames(self.run_sheet, 4)

def load_frames(self, sheet, num_frames):
"""
prepare frame slices for dog running animation
"""
#slice each frame to a list so we can cycle through it
frames = []
for i in range(num_frames):
    frame=sheet.subsurface((i * 64, 0, 64, 64))
    frame= pygame.transform.scale(frame, (64 * 5, 64 * 5))
    frames.append(frame)
return frames
Then i needed to create a function to track if the sprite is moving toward the x target or not, call that function in draw_anim(), then change update_animation() to use a new definition for frames instead of self.frames
def is_moving(self):
	"""
	Check for movement for idle animation
	"""
	return self.dog_x != self.dog_target_x

def draw_anim(self, screen):
	"""
	Draw current frame from update_animation() onto screen
	"""
	if self.is_moving():
		frames = self.run_frames
	else:
		frames = self.idle_frames

	current = frames[self.current_frame]
	if self.dog_target_x > self.dog_x: #if target is to the right, flip sprite
		current = pygame.transform.flip(current, True, False)

	frame_rect = current.get_rect(center=(self.dog_x, 100)) #rectanle to centre running animation
	screen.blit(current, frame_rect) #blit the current frame to the screen

def update_animation(self):
"""
Cycle animation frames for dog running
"""
#animate the spritesheet list for running dog sprite
frames = self.run_frames if self.is_moving() else self.idle_frames
self.frame_timer += 1
if self.frame_timer >= self.animation_speed:
    self.frame_timer = 0
    self.current_frame = (self.current_frame + 1) % len(frames)
Note: I have also changed the positional values of some of the elements at this stage
Time based sleeping animation
The next animation would be one that triggers at night (9pm) and is maintained until morning (6am). To do this i first added another sprite sheet to __init__ and defined a function to return the desired time range.
def __init__(self, backgrounds):
	"""
	import and resize assets, __init__ function
	"""
	self.ruger = pygame.transform.scale(pygame.image.load('assets/Rugerhead.png'), (100,100)) #static dog sprite
	self.backgrounds = backgrounds
	self.current_bg = 0
	self.font = pygame.font.Font("assets/LanaPixel_NoKorean.ttf", 80) #initialiase sys font and sizing

	# Animation sheets and frames
	self.run_sheet = pygame.image.load("assets/ruger-sprint.png") #load spritehseet for running animation
	self.idle_sheet = pygame.image.load("assets/sit.png")
	self.sleep_sheet = pygame.image.load("assets/Rugersleepy.png")
	self.idle_frames = self.load_frames(self.idle_sheet, 4)
	self.run_frames = self.load_frames(self.run_sheet, 4)
	self.sleep_frames = self.load_frames(self.sleep_sheet, 8)

def is_night(self):
	"""
	Checks for local time 9pm-6am
	"""
	current_hour = datetime.now().hour
	return current_hour >= 21 or current_hour < 7
Next i needed to update several existing functions to support the new time-based approach and make sure the sprite won't move while sleeping.
def draw_anim(self, screen):
    """
    Draw current frame from update_animation() onto screen
    """
    if self.is_night():
        frames = self.sleep_frames
    elif self.is_moving():
        frames = self.run_frames
    else:
        frames = self.idle_frames

    current = frames[self.current_frame]
    if self.dog_target_x > self.dog_x: #if target is to the right, flip sprite
        current = pygame.transform.flip(current, True, False)

    frame_rect = current.get_rect(center=(self.dog_x, 100)) #rectanle to centre running animation
    screen.blit(current, frame_rect) #blit the current frame to the screen

def update_animation(self):
	"""
	Cycle animation frames depending on the required animation
	"""
	if self.is_night():
		frames = self.sleep_frames
	elif self.is_moving():
		frames = self.run_frames
	else:
		frames = self.idle_frames

	if self.current_frame >= len(frames): #incase we switch animations on frame 4+ of sleep it wont crash since the others only have 4 frames
		self.current_frame = 0

	#animate the spritesheet list for running dog sprite
	self.frame_timer += 1
	if self.frame_timer >= self.animation_speed:
		self.frame_timer = 0

		if self.is_night(): #to stop on last frame of sleep animation
			if self.current_frame < len(frames) -1:
				self.current_frame += 1
		else:
			self.current_frame = (self.current_frame + 1) % len(frames)

def draw_anim(self, screen):
	"""
	Draw current frame from update_animation() onto screen
	"""
	if self.is_night():
		frames = self.sleep_frames
	elif self.is_moving():
		frames = self.run_frames
	else:
		frames = self.idle_frames

	current = frames[self.current_frame]
	if self.dog_target_x > self.dog_x and not self.is_night(): #if target is to the right, flip sprite only if not sleeping
		current = pygame.transform.flip(current, True, False)

	frame_rect = current.get_rect(center=(self.dog_x, 100)) #rectanle to centre running animation
	screen.blit(current, frame_rect) #blit the current frame to the screen

def update_dog_pos(self):
	"""
	Move dog horizontally towards its target position
	"""
	if not self.is_night(): #if not sleeping
		if self.dog_x < self.dog_target_x: #if tapped on pos x value
			self.dog_x += self.dog_speed
			if self.dog_x > self.dog_target_x: #avoid overshooting
				self.dog_x = self.dog_target_x
		elif self.dog_x > self.dog_target_x: #if tapped on neg x value
			self.dog_x -= self.dog_speed
			if self.dog_x < self.dog_target_x: #overshoot
				self.dog_x = self.dog_target_x
Here is a test i ran using sleep time as 6:32pm and wakeup time 15 sec later
MOTD Banner and adding date
At this point it dawned on me that I had forgotten to add a date/day value to the clock, and I wanted to add a scrolling MOTD banner. I started this by defining more __init__ variables for the MOTD banner.
def __init__(self, backgrounds):
    #motd variables and array
    self.motd_messages = [
        "We are so proud of you!",
        "Have the best day <3",
        "We love you so much",
        "You are doing amazing",
        "you got this my love"
    ]
    self.motd_font = pygame.font.Font("assets/LanaPixel_NoKorean.ttf", 30)
    self.motd_x = 640
    self.motd_speed = 2 # 2 px per frame
    self.today_motd = self.get_daily_message()
    self.motd_surface = self.motd_font.render(self.today_motd, True, "white")
Then created a function to determine the MOTD, one to update it, and a draw function to blit it
def get_daily_message(self):
	"""
	Picks a message for the day based on date
	"""
	day_number = datetime.now().timetuple().tm_yday #day of year
	index = day_number % len(self.motd_messages) #wrap around using modulo
	return self.motd_messages[index] # return the message at the modulated index

def update_motd(self):
	"""
	Scroll MOTD from right to left
	"""
	self.motd_x -= self.motd_speed
	if self.motd_x < -self.motd_surface.get_width():
		self.motd_x = 640

def draw_motd(self, screen):
	"""
	Draws scrolling MOTD
	"""
	screen.blit(self.motd_surface, (self.motd_x, 10))
To add the date values I mostly reused code from the time functions
def draw_date(self, screen):
	"""
	Draws current date below the timeface
	"""
	current_date = datetime.now()
	date_string = current_date.strftime("%A, %d %B") # Named day as well as number, and named month e.g "Saturday, 20 June"
	date_surf = self.weather_font.render(date_string, True, "white") #just reusing the weather font config
	date_rect = date_surf.get_rect(center=(320, 300)) #position just below clock
	screen.blit(date_surf, date_rect)
Sleep Mode
Finally I decided to expand the sleep logic to actually dim the screen at 9pm and have the screen be mostly black with just the time showing. Once again i created more __init__ variables.
#nightmode
self.awake_until = 0 # timestamp for where nightmode is in awake mode
self.dim_overlay = pygame.Surface((640, 480))
self.dim_overlay.fill((0,0,0))
self.dim_overlay.set_alpha(128) #50% opacity
I then made a function to test when sleep mode actually activates based on is_night(), then add it to the event_handler.
def is_sleeping(self):
	"""
	Returns true if is_night is true AND not currently in awake mode
	"""
	if time.time() < self.awake_until:
		return False # awake mode is on, screen looks normal temporarilly
	return self.is_night()

def event_handler(self,events):
	"""
	Event handler for this class
	"""
	for event in events:
		if event.type == pygame.QUIT:
			return "quit", None
		if event.type == pygame.FINGERDOWN:
			if self.is_sleeping():
				self.awake_until = time.time() + 30 #wake for 30 sec
				return None, None

			tap_x = int(event.x * 640)
			tap_y = int(event.y * 480)
			if tap_x > 560 and tap_y > 440:
				return "settings", None
			else:
				self.dog_target_x = tap_x
	return None, None
And finally a new draw function to create the nightscreen itself.
def draw_nightmode(self, screen):
        """
        Black BG, clockface and sleep animation, dimmed by 50%
        """
        screen.fill((0,0,0))

        current_time = datetime.now() #grab current local time
        time_string=current_time.strftime("%I:%M.%S %p") #format time as string
        time_surf = self.font.render(time_string, True, "white") #font formatting for time
        time_rect = time_surf.get_rect(center=(320, 240)) #centre alignment of the clockface on the HAT display
        screen.blit(time_surf, time_rect) #draw text surface on display window surface (screen)

        current = self.sleep_frames[self.current_frame]
        screen.blit(current, current.get_rect(center=(self.dog_x,100)))

        screen.blit(self.dim_overlay, (0,0))

def draw(self, screen):
        """
        Draw all the defined items for the class
        """
        if self.is_sleeping():
            self.draw_nightmode(screen)
            return

        screen.blit(self.backgrounds[self.current_bg], (0,0)) #set BG to current selection
        self.draw_clock(screen)
        self.draw_dog(screen)
        self.draw_anim(screen)
        self.draw_weather(screen)
        self.draw_motd(screen)
        self.draw_date(screen)
Here is a test I ran where sleep mode kicks in at 8:44am, lasts 20 sec, and awake mode is set to 5 sec upon touch.
Final step, run on boot
To make the project run upon the Pi booting i needed to create a service file that runs on startup, back in the SSH terminal i did the following
sudo nano /etc/systemd/system/clockscreen.serviceOnce the new file opened i added these config options (comments included for sake of learning)
#General info about service
[Unit]

#Readable name for service
Description=Bedside Clock Display
#wait until system is fully booted up before starting the process
After=multi-user.target

#describes how to actually run the service
[Service]

#normal, long running program
Type=simple
#run as this user account
User=(enter user here)
#set current directory so we can access all assets related to service
WorkingDirectory=/home/(enter user here)/clock_project
#actual command to run it, like typing python3 main.py in terminal
ExecStart=/usr/bin/python3 /home/(enter user here)/clock_project/main.py
#if a crash happens restart the service automatically
Restart=on-failure
#wait 5 sec before restart attempt
RestartSec=5

#when system reaches multi user mode during boot, start this automatically
[Install]
WantedBy=multi-user.target
Finally, enable and start the service!
sudo systemctl enable clockscreen.service
sudo systemctl start clockscreen.service
And it is done!
Summary
This was a super fun little project that was entirely outside anything i have done, Pygame is an interesting and easy to use bit of kit that i may use in future projects for a bit of fun. I may make some additions to the clock in the future, like a small game or something that can be played or just some more animations and backgrounds.
This Pi now runs Pi-hole, Unbound, has a WireGuard tunnel and has a functional digital clock interface.
Here is the final result as shown at the top of the page.
Final complete code
import pygame
import requests
import time
from datetime import datetime

##############################
###### weather ###############
##############################
def get_weather():
    """
    Fetch current temp and weather code from open-meteo for given params
    """
    url = "https://api.open-meteo.com/v1/forecast"
    params = {
        "latitude": -41.4332,
        "longitude": 147.1441,
        "current_weather": True
    }
    response = requests.get(url, params=params, timeout=5) #GET request using the url and given parameter dict
    data = response.json() # the response data dict
    weather = data["current_weather"] #weather = all data items in the "current_weather" bracket (should be temp, wind speed, weather code etc)
    return weather["temperature"], weather["weathercode"] #return temp and code from the pulled data

def weather_code_to_text(code):
    """Map Open-Meteo's numeric weather code to a simple description."""
    if code == 0:
        return "clear"
    elif code in [1, 2, 3]:
        return "cloudy"
    elif code in [45, 48]:
        return "foggy"
    elif code in [51, 53, 55, 61, 63, 65]:
        return "rainy"
    elif code in [71, 73, 75]:
        return "snowy"
    elif code in [95, 96, 99]:
        return "stormy"
    else:
        return "unknown"

##############################
###### classes ###############
##############################
class ClockScreen:

    def __init__(self, backgrounds):
        """
        import and resize assets, __init__ function
        """
        self.ruger = pygame.transform.scale(pygame.image.load('assets/Rugerhead.png'), (100,100)) #static dog sprite
        self.backgrounds = backgrounds
        self.current_bg = 0
        self.font = pygame.font.Font("assets/LanaPixel_NoKorean.ttf", 80) #initialiase sys font and sizing

        # Animation sheets and frames
        self.run_sheet = pygame.image.load("assets/ruger-sprint.png") #load spritehseet for running animation
        self.idle_sheet = pygame.image.load("assets/sit.png")
        self.sleep_sheet = pygame.image.load("assets/Rugersleepy.png")
        self.idle_frames = self.load_frames(self.idle_sheet, 4)
        self.run_frames = self.load_frames(self.run_sheet, 4)
        self.sleep_frames = self.load_frames(self.sleep_sheet, 8)


        #weather values
        self.weather_temp = None
        self.weather_code = None
        self.last_weather_check = 0
        self.weather_font = pygame.font.Font("assets/LanaPixel_NoKorean.ttf", 50)

        #animation timing values
        self.current_frame = 0
        self.animation_speed = 2
        self.frame_timer = 0

        #dog movement values
        self.dog_x = 320
        self.dog_target_x = 320
        self.dog_speed = 4

        #nightmode
        self.awake_until = 0 # timestamp for where nightmode is in awake mode
        self.dim_overlay = pygame.Surface((640, 480))
        self.dim_overlay.fill((0,0,0))
        self.dim_overlay.set_alpha(128) #50% opacity

        #weather icon sprites, mapped to the same names as the weather_code_to_text
        self.weather_icons = {
            "clear": pygame.transform.scale_by(pygame.image.load('assets/sun.png').convert_alpha(), 1.2),
            "cloudy": pygame.transform.scale_by(pygame.image.load('assets/cloud.png').convert_alpha(), 1.2),
            "rainy": pygame.transform.scale_by(pygame.image.load('assets/raincloud.png').convert_alpha(), 1.2),
            "stormy": pygame.transform.scale_by(pygame.image.load('assets/stormcloud.png').convert_alpha(), 1.2),
            "snowy": pygame.transform.scale_by(pygame.image.load('assets/snowcloud.png').convert_alpha(), 1.2),
            "foggy": pygame.transform.scale_by(pygame.image.load('assets/fog.png').convert_alpha(), 1.2)
        }

        #motd variables and array
        self.motd_messages = [
            "We are so proud of you!",
            "insert any other messages here",
        ]
        self.motd_font = pygame.font.Font("assets/LanaPixel_NoKorean.ttf", 40)
        self.motd_x = 640
        self.motd_speed = 2 # 2 px per frame
        self.today_motd = self.get_daily_message()
        self.motd_surface = self.motd_font.render(self.today_motd, True, "white")

    def load_frames(self, sheet, num_frames):
        """
        prepare frame slices for dog running animation
        """
        #slice each frame to a list so we can cycle through it
        frames = []
        for i in range(num_frames):
            frame=sheet.subsurface((i * 64, 0, 64, 64))
            frame= pygame.transform.scale(frame, (64 * 5, 64 * 5))
            frames.append(frame)
        return frames

    def event_handler(self,events):
        """
        Event handler for this class
        """
        for event in events:
            if event.type == pygame.QUIT:
                return "quit", None
            if event.type == pygame.FINGERDOWN:
                if self.is_sleeping():
                    self.awake_until = time.time() + 30 #wake for 30 sec
                    return None, None

                tap_x = int(event.x * 640)
                tap_y = int(event.y * 480)
                if tap_x > 560 and tap_y > 440:
                    return "settings", None
                else:
                    self.dog_target_x = tap_x
        return None, None

    def draw_clock(self, screen):
        """
        Draw realtime clockface onto screen
        """
        current_time = datetime.now() #grab current local time
        time_string=current_time.strftime("%I:%M.%S %p") #format time as string
        time_surf = self.font.render(time_string, True, "white") #font formatting for time
        time_rect = time_surf.get_rect(center=(320, 240)) #centre alignment of the clockface on the HAT display
        screen.blit(time_surf, time_rect) #draw text surface on display window surface (screen)

    def draw_dog(self, screen):
        """
        Draw static pixel art dog face
        """
        dog_rect = self.ruger.get_rect(center=(580, 440)) #position the sprite in the bottom right corner setting menu area
        screen.blit(self.ruger, dog_rect) #blit the sprite onto the screen

    def draw_weather(self, screen):
        """
        Create a visual representation of the weather data
        """
        if self.weather_temp is None:
            return #incase weather isnt loaded yet, skip

        #create weather_text using relevant code-text entry
        weather_text = weather_code_to_text(self.weather_code) # text value mapping from weather code function
        display_string = f"{round(self.weather_temp)}°C {weather_text}" #string format temp: weather type

        weather_surface = self.weather_font.render(display_string, True, "white") #render the font
        screen.blit(weather_surface, (10,420)) #blit to the screen in bottom left corner
        text_width = weather_surface.get_width() #grab text with for icon placement

        #draw icon after text
        icon = self.weather_icons.get(weather_text)
        if icon:
            screen.blit(icon, (10 + text_width + 10, 400)) #10px gap after text width

    def update_animation(self):
        """
        Cycle animation frames depending on the required animation
        """
        if self.is_sleeping():
            frames = self.sleep_frames
        elif self.is_moving():
            frames = self.run_frames
        else:
            frames = self.idle_frames

        if self.current_frame >= len(frames): #incase we switch animations on frame 4+ of sleep it wont crash since the others only have 4 frames
            self.current_frame = 0

        #animate the spritesheet list for running dog sprite
        self.frame_timer += 1
        if self.frame_timer >= self.animation_speed:
            self.frame_timer = 0

            if self.is_sleeping(): #to stop on last frame of sleep animation
                if self.current_frame < len(frames) -1:
                    self.current_frame += 1
            else:
                self.current_frame = (self.current_frame + 1) % len(frames)

    def update_dog_pos(self):
        """
        Move dog horizontally towards its target position
        """
        if not self.is_sleeping(): #if not sleeping
            if self.dog_x < self.dog_target_x: #if tapped on pos x value
                self.dog_x += self.dog_speed
                if self.dog_x > self.dog_target_x: #avoid overshooting
                    self.dog_x = self.dog_target_x
            elif self.dog_x > self.dog_target_x: #if tapped on neg x value
                self.dog_x -= self.dog_speed
                if self.dog_x < self.dog_target_x: #overshoot
                    self.dog_x = self.dog_target_x

    def is_moving(self):
        """
        Check for movement for idle animation
        """
        return self.dog_x != self.dog_target_x

    def is_night(self):
        """
        Checks for local time 9pm-6am
        """
        current_hour = datetime.now().hour
        return current_hour >= 21 or current_hour < 7

    def is_sleeping(self):
        """
        Returns true if is_night is true AND not currently in awake mode
        """
        if time.time() < self.awake_until:
            return False # awake mode is on, screen looks normal temporarilly
        return self.is_night()

    def draw_nightmode(self, screen):
        """
        Black BG, clockface and sleep animation, dimmed by 50%
        """
        screen.fill((0,0,0))

        current_time = datetime.now() #grab current local time
        time_string=current_time.strftime("%I:%M.%S %p") #format time as string
        time_surf = self.font.render(time_string, True, "white") #font formatting for time
        time_rect = time_surf.get_rect(center=(320, 240)) #centre alignment of the clockface on the HAT display
        screen.blit(time_surf, time_rect) #draw text surface on display window surface (screen)

        current = self.sleep_frames[self.current_frame]
        screen.blit(current, current.get_rect(center=(self.dog_x,100)))

        screen.blit(self.dim_overlay, (0,0))


    def get_daily_message(self):
        """
        Picks a message for the day based on date
        """
        day_number = datetime.now().timetuple().tm_yday #day of year
        index = day_number % len(self.motd_messages) #wrap around using modulo
        return self.motd_messages[index] # return the message at the modulated index

    def update_motd(self):
        """
        Scroll MOTD from right to left
        """
        self.motd_x -= self.motd_speed
        if self.motd_x < -self.motd_surface.get_width():
            self.motd_x = 640

    def draw_motd(self, screen):
        """
        Draws scrolling MOTD
        """
        screen.blit(self.motd_surface, (self.motd_x, 10))

    def draw_date(self, screen):
        """
        Draws current date below the timeface
        """
        current_date = datetime.now()
        date_string = current_date.strftime("%A, %d %B") # Named day as well as number, and named month e.g "Saturday, 20 June"
        date_surf = self.weather_font.render(date_string, True, "white") #just reusing the weather font config
        date_rect = date_surf.get_rect(center=(320, 300)) #position just below clock
        screen.blit(date_surf, date_rect)

    def draw_anim(self, screen):
        """
        Draw current frame from update_animation() onto screen
        """
        if self.is_sleeping():
            frames = self.sleep_frames
        elif self.is_moving():
            frames = self.run_frames
        else:
            frames = self.idle_frames

        current = frames[self.current_frame]
        if self.dog_target_x > self.dog_x and not self.is_sleeping(): #if target is to the right, flip sprite only if not sleeping
            current = pygame.transform.flip(current, True, False)

        frame_rect = current.get_rect(center=(self.dog_x, 125)) #rectangle to centre running animation just above clockface
        screen.blit(current, frame_rect) #blit the current frame to the screen

    def update(self):
        """
        Update screen for animations etc
        """
        self.update_animation()
        self.update_dog_pos()
        self.update_motd()
        if time.time() - self.last_weather_check > 600: # 10 min check window
            try:
                self.weather_temp, self.weather_code = get_weather()
            except:
                pass #just keep last request if new request fails
            self.last_weather_check = time.time()

    def draw(self, screen):
        """
        Draw all the defined items for the class
        """
        if self.is_sleeping():
            self.draw_nightmode(screen)
            return

        screen.blit(self.backgrounds[self.current_bg], (0,0)) #set BG to current selection
        self.draw_clock(screen)
        self.draw_dog(screen)
        self.draw_anim(screen)
        self.draw_weather(screen)
        self.draw_motd(screen)
        self.draw_date(screen)

class SettingsScreen:

    def __init__(self, backgrounds, current_bg):
        """
        Initialise screen variables and elements
        """
        self.backgrounds = backgrounds #shared list of backgrounds
        self.current_bg = current_bg # index of current selected background
        self.bg_names = ["light blue", "dark blue", "green", "red"]  # display names matching the backgrounds list order
        self.font = pygame.font.Font("assets/LanaPixel_NoKorean.ttf", 40) #font for options

        self.spacing = 60  # pixels between each option

    def event_handler(self, events):
        """
        Handle the different events of the settings screen
        """
        for event in events:
            if event.type == pygame.QUIT:
                return "quit", self.current_bg

            if event.type == pygame.FINGERDOWN:
                #convert 0-1.0 touch coords to actual screen pixels
                #event.x and event.y are builtin pygame features for FINGERDOWN, they give normalised coordinates 0.0-1.0 for x and y on the action
                tap_x = int(event.x * 640) #convert 0.0-1.0 to 0-640
                tap_y = int(event.y * 480) #convert 0.0-1.0 to 0-480

                #define area of screen to press to go back to clockface
                if tap_x < 80 and tap_y < 50:
                    return "clock", self.current_bg #return "clock" (ClockFace class) and the current selected BG index

                for i, name in enumerate(self.bg_names):
                    #calculate y on the fly, y = 200 + spacing value * index of BG option
                    y = 200 + i * self.spacing
                    if y <= tap_y <= y + 50: # if tap_y is within a certain threshold of the option
                        self.current_bg = i #set the current_bg to the current index that was clicked on
                        return "clock", self.current_bg #return to clockface with newly selected bg
        return None, self.current_bg

    def update(self):
        pass

    def draw(self, screen):
        """
        Draw the established elements of settings menu onto the screen
        """
        screen.fill((20,20,20)) #overwrite the previous screen before drawing the new one
        title = self.font.render("background", True, "white") #title of the screen
        screen.blit(title, title.get_rect(center=(320, 100))) #blit the title using a rect position

        for i, name in enumerate(self.bg_names):
            #space each option evenly downward from y=200 in accordance with the touch areas
            y = 200 + i * self.spacing
            colour = (255, 255, 0) if i == self.current_bg else (255, 255, 255) #change color of option when its the one selected currently
            text = self.font.render(name, True, colour) #render the text
            screen.blit(text, text.get_rect(center=(320, y))) #blit the text at the y position of the option

        back = self.font.render("< back", True, "white") #text display for back button
        screen.blit(back, (10, 10))

##############################
###### setup #################
##############################
pygame.init()
screen = pygame.display.set_mode((640, 480)) #establish display
clock = pygame.time.Clock() #set up clockrate
pygame.mouse.set_visible(False) #hide cursor
running = True #runtime boolean

# BG options
backgrounds = [
    pygame.image.load('assets/lightblue.png').convert(),
    pygame.image.load('assets/darkblue.png').convert(),
    pygame.image.load('assets/green.png').convert(),
    pygame.image.load('assets/red.png').convert(),
]

##############################
###### main loop #############
##############################

scenes = {
    "clock": ClockScreen(backgrounds),
    "settings": SettingsScreen(backgrounds, 0)
}
current_scene = scenes["clock"]

while True:
    events = pygame.event.get()
    next_scene, new_bg = current_scene.event_handler(events)
    if new_bg is not None: #if we get a new_bg input allocate it
        scenes["clock"].current_bg = new_bg
    if next_scene:
        current_scene = scenes[next_scene]
    current_scene.update()
    current_scene.draw(screen)
    pygame.display.flip() #flip() to show work on screen
    clock.tick(30) #limit to 30fps